CLICK HERE FOR FREE BLOGGER TEMPLATES, LINK BUTTONS AND MORE! »

Monday, June 25, 2012

Art Birthday Party

I first got the idea for an Art Birthday Party in 2003; I clipped an article about an art birthday party from a magazine.  I knew that if I was fortunate enough to be a Mommy someday, that an art birthday party would be a must.  2012 ended up being the perfect year for one.  We could not travel home to visit family for both childrens birthdays, so we had a joint birthday party.  Arts and Crafts is a common event in our household; so the party was of interest to both kiddos.  I started by gathering inspiration pictures from yahoo images and Pinterest.  Here are a few of the inspiration photos I used in addition to my 2003 magazine article.  I had about 50 inspiration pictures in all to daydream with.  Some of the ideas were not cost efficient and some I just flat out decided I didn't want to mess with.  I am thrilled with the success of the party, but I must admit I didn't follow through with everything as I ended up being in my first trimester with our third child (I was a bit tired!).


The entire family pitched in the day of the party making it lots of fun for the kiddos.  I decided that I loved the Pablo Picaso quote, "Every Child is an Artist."  I also selected a painters palette as a main icon.  We purchased a canvas from Hobby Lobby when it was half off.  My six and seven year old painted the paint splotches all over the canvas and I added the quote. 

For most family members a facebook invitation or phone call was all the invitation they recieved.  For all children however they recieved a paper invite.  The invitation contains a canvas card that I found at a craft store.  The child was prompted to paint or color whatever they wanted on their card and send it back to us as their RSVP.  I took each childs' artwork and framed it using Dollar Store frames.  Their art work was on display when they arrived and they were given it to take home at the end of the party. 

I really loved the idea of using paint cans.  Most of the inspriation photos had them with treats and candy on the tables.  I found small clear paint cans from oriental trading company and decided to use them as the treat bags for the kids.  We filled them with fun art supplies and a few fun goodies.  Most of the contents were purchased at Dollar Tree and then divided up between the paint cans.  Although we had items that were too tall, the paint cans did have lids and we sent them home with the kids.

My mother in law was going through in this picture putting finishing touches which included retaping some table cloths!  We used Dollar Tree table cloths in multiple colors for the tables and the walls.  We had streamers in rainbow colors along the ceiling (thanks to my husband). The kids table is seen in this picture.  Every child had an apron, a paint palette place setting, and a miniature easel and canvas with their name on it.  

As guests (and kids) arrived the adults mingled while the kiddos were directed to their table.  They found their seats by finding their name.  Each child had a foam Door Hanger to decorate.  There were little containers of foam stickers all over the table for easy decorating (all foam supplies also purchased at Dollar Tree)  You can see the tables for the adults.  Each table had a colorful container in the middle with random art supplies.  Every guest has a piece of cardstock at their chair in the shape of a paint palette.  It was a bit time consuming to cut them all out, but the effect was adorable in the room.  Plus we have some fun art work from our adult guests as memories!

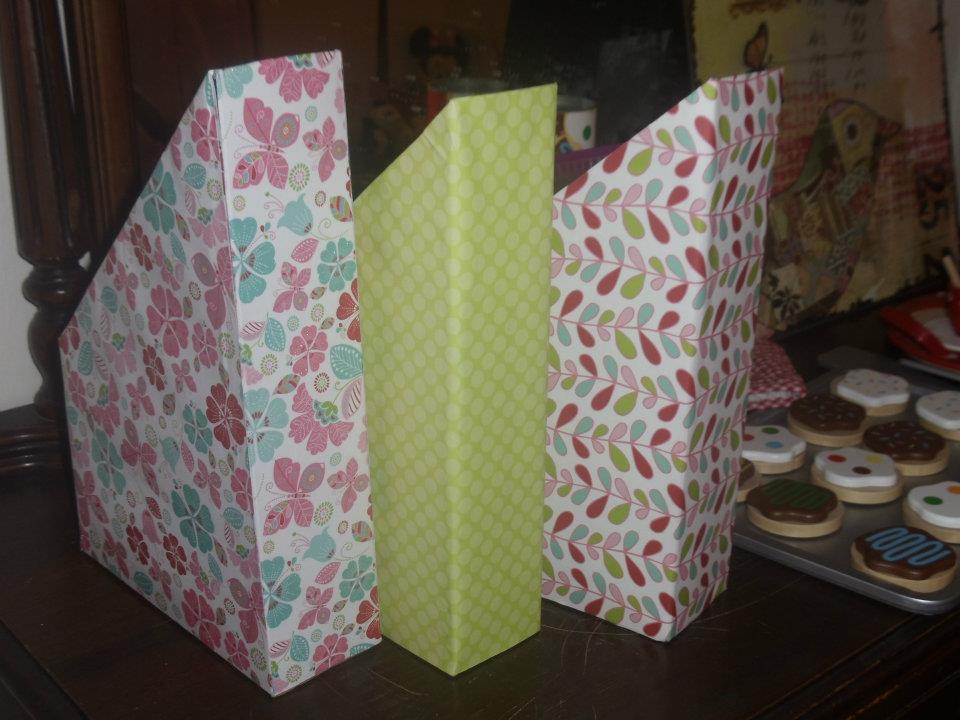
As soon as everyone arrived we had our goodies first.  We kept this pretty simple; cookies, rice krispy treats, and colorful cupcakes.  On another table were juice boxes, bottled water, and cups of trail mix.  I didn't get a picture, but we did clear plastic cups with a bit of trail mix in them and a toothpick cupcake topper sticking out the top (this is seen in one of the top inspiration pictures).


MORE TO COME TOMORROW!!!!


~thehopefulorganizer

Monday, January 16, 2012

Candy covered box

~thehopefulorganizer

Framed Words


Dollar Tree frames, scrapbook paper, letters printed from computer and cut out. 

Can use any word for any event or season
~thehopefulorganizer

Nutter Butter Snowmen

~thehopefulorganizer

Cereal Boxes turned Magazine Holders


~thehopefulorganizer

Photo Strip Ornament

 Photo Strip Christmas Ornament


~thehopefulorganizer

Saturday, January 14, 2012

Fabric Wreaths

I have been making fabric wreaths since I was a little girl.  My Mom would help us make them for gifts or for our own home.  I have started this tradition with my children.  We made several wreaths last year as gifts.  This year we made a large fall wreath and a pretty christmas wreath for a gift. 


Supplies:
You need a straw wreath (leave the plastic on it), assorted coordinating fabric, ribbon if desired.  How much fabric really varies on the size of your wreath.  I usually get atleast a yard of each kind and sometimed double of a base color of fabric.  As you make the wreath you space the fabric out and you will be able to tell if you need more fabric before its too late.  I have had to go out and get an new color of fabric and fill in holes at the end and the wreaths still turn out great!


You can use pinking shears to have pretty edges, or just cut straight with a rotary cutter.  I do not do exact measurements at all.  Some of my squares are only squares in theory because they are very lopsided.  I usually shoot for about 5 or 6 inches.  Quite a bit of the fabric goes into the wreath. 


A pile of cut squares ready to go

Use a sharpened pencil to push fabric squares into the wreath.  When you first start the underneath "ugly" side of the fabric will show.  By the time its done and filled in it is not noticeable.  For your ribbon you just cut it to whatever length you like and push it in with a pencil as well.  I kind of like when the ribbon hangs out longer than the fabric. 

You can cover the wreath one the chosen front side and then around the edges.  You can leave the back bare or cover it with fabric too.  You want to rotate around the entire wreath and space your colors out. 


~thehopefulorganizer

15 Minute Junk Drawer Update

I have always enjoyed picking a drawer or a shelf to organize. Not only does it make life easier down the road, but for that one moment I am able to put order and control where chaos once ruled.

I was feeling a bit frustrated (possibly even angry) yesterday. I didn't have anything specific to be angry about, but I was anyway. I had to run to the store to get milk and eggs anyway, so I just picked up some plain jane, inexpensive drawer organizers. I have some preferred organizers that I like to get from thecontainerstore, but the generic kind of walmart work just as well!

First I just dumped all the items from the drawer onto the countertop and began to sort. Don't get too worked up in the sorting... and allow for some catch all categories. Decide what gets to keep a home in the drawer and what needs to go live somewhere else.


I started putting stuff into the individual dividers and placing in the drawer.  I am sure I will need to tweak it a few times over the next couple of weeks to fit our living style, but it’s so much better.  And for a 15 minute investment of time and reward was well worth it. 


~thehopefulorganizer